Getting started with Electrode Native
The Getting Started tutorial walks you through creating a simple movie application using Electrode Native.
We'll use Android for this tutorial. If you wish to use iOS instead, click the iOS tab on the top-right of this page.
We'll use iOS for this tutorial. If you wish to use Android instead, click the Android tab on the top-right of this page.
The movie application includes two React Native MiniApps and two APIs:
- MovieListMiniApp | This MiniApp displays a list of movies.
- MovieDetailsMiniApp | This MiniApp displays the details of a selected movie.
- MoviesApi | An API used to retrieve a list of movies.
- NavigationApi | An API used to navigate from one MiniApp to another.
The tutorial shows how easy it is to integrate multiple React Native applications into a native application, and how to easily communicate between the JavaScript and the native side using APIs.
Before you begin
- Install Android Studio and Electrode Native if they're not already installed.
Download Android 7.0 (Nougat) and accept it's license:
- In Android Studio go to Tools → Android → SDK Manager
- Select the “Android 7.0 (Nougat)” checkbox
Click “Apply” and follow the prompts:
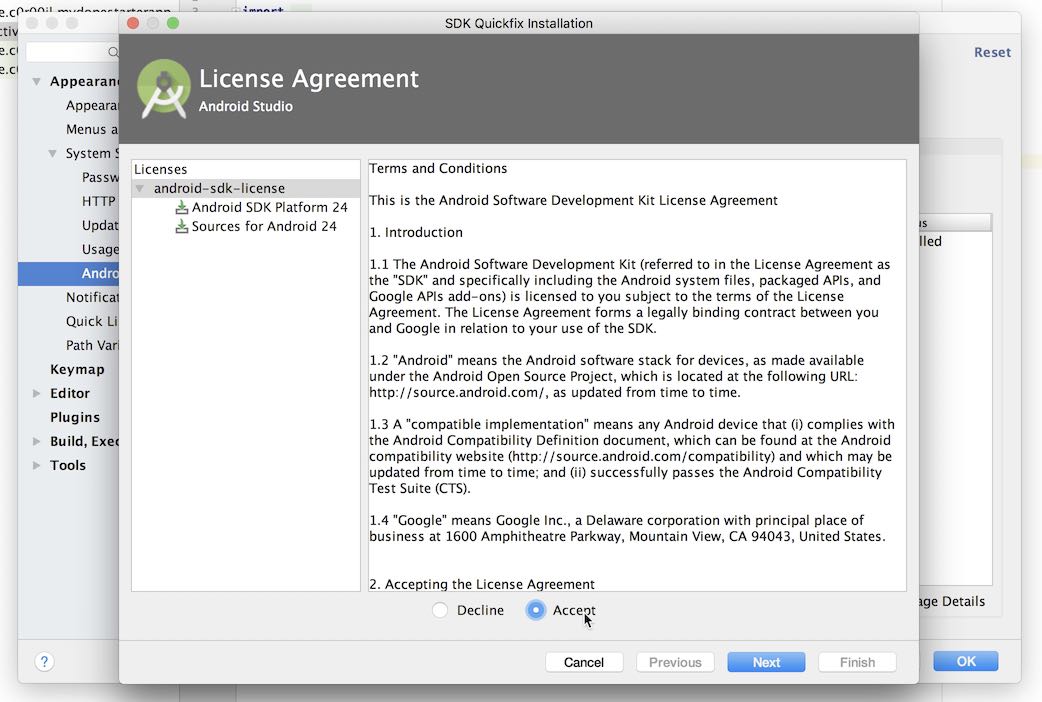
The manager will download all the dependencies:
- Set up an emulator if you want to run the application in an emulator. For more information on how to setup an emulator, you can check the Android documentation
- Install Xcode and Electrode Native if they're not already installed.
- Create a working directory named
ElectrodeNativeTutorialto hold all tutorial project files
Creating the MovieList MiniApp
1) Move to the working directory and create a MiniApp named MovieListMiniApp using the ern create-miniapp command.
$ cd ElectrodeNativeTutorial
$ ern create-miniapp MovieListMiniApp
2) When asked to enter a package name for this MiniApp, hit enter to use the default name. You may check the package name requirements
3) Move to the MovieListMiniApp directory and run the MiniApp to view it, using the ern run command.
$ cd MovieListMiniApp
$ ern run-android
$ cd MovieListMiniApp
$ ern run-ios
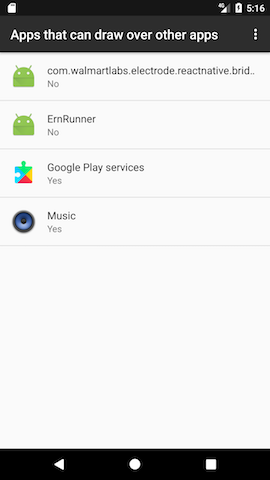
4) First time users will need to grant the SYSTEM_ALERT_WINDOW permission for ErnRunner app . (Learn More).
Once done exit from the ErnRunner app and launch it again from applications.

5) Select an emulator (or device) from the list when prompted.
4) Select an emulator (or device) from the list when prompted.
Once the command completes, you will see your first MiniApp running. If you used React Native previously, you'll notice that this MiniApp is the same as the React Native default starter app--after all, a MiniApp is nothing more than a React Native application!
Now let's update the UI of this MiniApp to display a list of movies.
Updating the MovieList MiniApp UI
1) Open the index.android.js file in your favorite JavaScript editor.
1) Open the index.ios.js file in your favorite JavaScript editor.
2) Replace the content of this source file with the following code.
/**
 * @flow
 */

import React, { Component } from 'react'
import {
  AppRegistry,
  StyleSheet,
  Text,
  View,
  FlatList,
  Image,
  TouchableHighlight
} from 'react-native'

export default class MovieListMiniApp extends Component {

  _keyExtractor = (item, index) => item.title;

  constructor () {
    super()
    this.state = {
      movies: [{
        title: 'The Fast and Furious',
        releaseYear: 2010,
        ratings: '4.5',
        imageUrl: 'http://bit.ly/2jRUZwE',
        description: 'The Fast and the Furious'
      }, {
        title: '2 Fast 2 Furious',
        releaseYear: 2011,
        ratings: '4.0',
        imageUrl: 'http://bit.ly/2jTfYPF',
        description: 'How fast do you like it ?'
      }]
    }
  }

  render () {
    return (
      <FlatList
        style={styles.container}
        data={this.state.movies}
        keyExtractor={this._keyExtractor}
        renderItem={({item}) =>
          <View style={styles.row}>
            <Image
              style={styles.icon}
              source={{
                uri: item.imageUrl ? item.imageUrl : 'http://bit.ly/2yz3AYe'
              }}
            />
            <View style={styles.row2}>
              <Text style={styles.title}>{item.title}</Text>
              <Text style={styles.subtitle}>{item.releaseYear}</Text>
            </View>
          </View>
        }
      />
    )
  }


}

const styles = StyleSheet.create({
  container: {
    flex: 1,
    marginTop: 20,
    padding: 5,
    backgroundColor: 'black'
  },
  row: {
    flex: 1,
    flexDirection: 'row',
    justifyContent: 'space-between',
    backgroundColor: 'white',
    padding: 12
  },
  row2: {
    flex: 1,
    flexDirection: 'column',
    justifyContent: 'space-between',
    backgroundColor: 'white',
    padding: 12
  },
  title: {
    fontSize: 20,
  },
  subtitle: {
    paddingTop: 5,
    flex: 1,
    fontSize: 12
  },
  icon: {
    width: 50,
    height: 70,
    flexShrink: 1,
    alignSelf: 'center'
  }
})

AppRegistry.registerComponent('MovieListMiniApp', () => MovieListMiniApp)
3) Save your changes in index.ios.js and reload the application to see the updated UI. Hit ⌘ + R in your iOS Simulator to reload the app and see your changes.
3) Save your changes in index.android.js and reload the application to see the updated UI. Press the R key twice or select Reload from the Developer Menu (⌘M).
Congratulations! You've successfully run and modified the initial UI of the MovieList MiniApp.
Now let's add an API to the MiniApp so that we can retrieve movies from the native application instead of manually hard coding them in the source code of our MiniApp.
Adding the MoviesApi to the MovieList MiniApp
We have already created and published the MoviesApi in this tutorial.
You may view the created API code at react-native-ernmovie-api and ern add react-native-ernnavigation-api repo.
1) Using the ern add command add MoviesApi , other dependent APIs and react-native-electrode-bridge as a dependency of MovieListMiniApp.
$ ern add react-native-ernmovie-api
$ ern add react-native-electrode-bridge
$ ern add react-native-ernnavigation-api
2) Open the index.android.js file and modify it as described in the next step.
2) Open the index.ios.js file and modify it as described in the next step.
3) Import MoviesApi and add it below other import statements of the JavaScript file:
import { MoviesApi } from 'react-native-ernmovie-api'
4) Replace the constructor method with the following code:
constructor () {
  super()

  MoviesApi.requests().getTopRatedMovies().then((movies) => {
    if (movies) {
      this.setState(previousState => {
        return {movies}
      })
    }
  }).catch(error => {
    let movies = [{
      title: 'Titanic',
      releaseYear: 1997,
      ratings: '4.5',
      imageUrl: 'http://bit.ly/2hnU8mq',
      description: 'Titanic'
    }, {
      title: 'Avatar',
      releaseYear: 2009,
      ratings: '4.0',
      imageUrl: 'http://bit.ly/2xAX0Cv',
      description: 'Avatar'
    }]

    this.setState(previousState => {
      return {movies}
    })
  })

  this.state = {
    movies: []
  }
}
5) Save file
6) Because we added an API, that contains some native code, we'll need to regenerate the container used by the native application, in order for it to include the native code of the API. This can be done using the run command which recreates a new local container and launches the application.
Enter the following run command:
$ ern run-android
$ ern run-ios
The UI displays the movie names that are set in the catch block. This means there was no API implementation available to serve the getTopRatedMovies request.
Now let's write an implementation of this API. Although you can write the implementation either on the JavaScript side or Native side, this tutorial shows how to write the implementation on the native side.
Implementing the MovieApi on the native side
1) Open the MainApplication.java file in your favorite IDE. The MainApplication.java file is located in the android/app/src/main/java/com/walmartlabs/ern/) directory. Alternatively, you can use Android Studio to open the Android project (in the android/ directory) and to edit this file.
2) Replace the code in the MainApplication.java file with the following code:
package com.walmartlabs.ern;

import android.app.Application;
import android.support.annotation.NonNull;
import android.support.annotation.Nullable;

import com.ernmvoie.ern.api.MoviesApi;
import com.ernmvoie.ern.model.Movie;
import com.walmartlabs.electrode.reactnative.bridge.ElectrodeBridgeRequestHandler;
import com.walmartlabs.electrode.reactnative.bridge.ElectrodeBridgeResponseListener;
import com.walmartlabs.electrode.reactnative.bridge.None;
import com.walmartlabs.ern.container.ElectrodeReactContainer;

import java.util.ArrayList;
import java.util.List;

public class MainApplication extends Application {

    @Override
    public void onCreate() {
        super.onCreate();

        ElectrodeReactContainer.initialize(this,
          new ElectrodeReactContainer.Config().isReactNativeDeveloperSupport(RunnerConfig.RN_DEV_SUPPORT_ENABLED));

        MoviesApi.requests().registerGetTopRatedMoviesRequestHandler(new ElectrodeBridgeRequestHandler<None, List<Movie>>() {
            @Override
            public void onRequest(@Nullable None payload, @NonNull ElectrodeBridgeResponseListener<List<Movie>> responseListener) {
              List<Movie> movies = new ArrayList<Movie>() {{
                add(new Movie.Builder("1", "The Shawshank Redemption").releaseYear(1994).rating(5f).imageUrl("http://bit.ly/2xZm1Zr").build());
                add(new Movie.Builder("2", "The Godfather").releaseYear(1972).rating(4.9f).imageUrl("http://bit.ly/2wK5TuA").build());
                add(new Movie.Builder("3", "The Godfather: Part II ").releaseYear(1974).rating(4f).imageUrl("http://bit.ly/2yysiIA").build());
                add(new Movie.Builder("4", "The Dark Knight").releaseYear(2008).rating(4f).imageUrl("http://bit.ly/2iZPBqw").build());
                add(new Movie.Builder("5", "12 Angry Men").releaseYear(1957).rating(3f).imageUrl("http://bit.ly/2xwkt7r").build());
              }};
              responseListener.onSuccess(movies);
            }
        });
    }
}
3) Relaunch the application
If you are using Android Studio, you can run the app directly from there or you can use the run command as shown below.
$ ern run-android
1) In Xcode, open the generated iOS project (in the ios directory).
2) Replace the content of the ViewController.h file with the content shown below:
#import <UIKit/UIKit.h>

@interface ViewController : UINavigationController

@end
3) Replace the code in the ViewController.m file with the following code.
#import "ViewController.h"
#import "RunnerConfig.h"
#import <ElectrodeContainer/ElectrodeContainer.h>

@interface ViewController ()
@end

@implementation ViewController

- (void)viewDidLoad {
    [super viewDidLoad];

    MoviesAPI* moviesApi = [[MoviesAPI alloc] init];

    [moviesApi.requests registerGetTopRatedMoviesRequestHandlerWithHandler:^(id  _Nullable data, ElectrodeBridgeResponseCompletionHandler  _Nonnull block) {
        NSMutableArray<Movie *> *movies = [[NSMutableArray alloc] init];

        [movies addObject:[self createMovie:@"1" title:@"The Shawshank Redemption" releaseYear:@1994 rating:@9.2 imageUrl:@"http://bit.ly/2xZm1Zr"]];
        [movies addObject:[self createMovie:@"2" title:@"The Godfather" releaseYear:@1972 rating:@9.2 imageUrl:@"http://bit.ly/2wK5TuA"]];
        [movies addObject:[self createMovie:@"3" title:@"The Godfather: Part II" releaseYear:@1974 rating:@9 imageUrl:@"http://bit.ly/2yysiIA"]];
        [movies addObject:[self createMovie:@"4" title:@"The Dark Knight" releaseYear:@2008 rating:@9 imageUrl:@"http://bit.ly/2iZPBqw"]];
        [movies addObject:[self createMovie:@"5" title:@"12 Angry Men" releaseYear:@1957 rating:@8.9 imageUrl:@"http://bit.ly/2xwkt7r"]];

        block(movies, nil);
    }];

   UIViewController *viewController =
   [[ElectrodeReactNative sharedInstance] miniAppWithName:MainMiniAppName properties:nil];
   [viewController setTitle:@"MovieList MiniApp"];
   viewController.view.frame = [UIScreen mainScreen].bounds;
   self.navigationBar.translucent = NO;
   [self pushViewController:viewController animated:NO];
}

- (void)didReceiveMemoryWarning {
    [super didReceiveMemoryWarning];
}

- (Movie *) createMovie : (NSString*) movieId title: (NSString*) title releaseYear: (NSNumber*) releaseYear rating: (NSNumber*) rating imageUrl: (NSString*) imageUrl {

    NSMutableDictionary* movieDict = [[NSMutableDictionary alloc]init];
    [movieDict setObject:movieId forKey:@"id"];
    [movieDict setObject:title forKey:@"title"];
    [movieDict setObject:releaseYear forKey:@"releaseYear"];
    [movieDict setObject:imageUrl forKey:@"imageUrl"];

    Movie *movie =[[Movie alloc] initWithDictionary:movieDict];
    return movie;
}

@end
3) Relaunch the application
You can launch the app directly from Xcode or you can use the run command as shown below.
$ ern run-ios
You can see that the UI now shows the movies that are stored in the native application.
Adding the Navigation API
We created this API for you for this tutorial--you can view it in the NavigationApi repository. This very simple API will be used for navigating from the MovieListMiniApp to the MovieDetailsMiniApp.
1) Mofify the index.android.js file as follows so that when selecting a movie in the list, the MovieListMiniApp will call the navigation API to navigate to the MovieDetailsMiniApp for this movie.
1) Mofify the index.ios.js file as follows so that when selecting a movie in the list, the MovieListMiniApp will call the navigation API to navigate to the MovieDetailsMiniApp for this movie.
2) Add the following import statement:
import { NavigationApi } from 'react-native-ernnavigation-api'
3) Replace the render method with the following method:
render () {
  return (
    <FlatList
      style={styles.container}
      data={this.state.movies}
      keyExtractor={this._keyExtractor}
      renderItem={({item}) =>
      <TouchableHighlight onPress={() => this._onPressRow(item)} underlayColor="gray">
        <View style={styles.row} onPress={() => this._onPressRow(item)}>
          <Image
            style={styles.icon}
            source={{
              uri: item.imageUrl ? item.imageUrl : 'http://bit.ly/2yz3AYe'
            }}
          />
          <View style={styles.row2}>
            <Text style={styles.title}>{item.title}</Text>
            <Text style={styles.subtitle}>{item.releaseYear}</Text>
          </View>
        </View>
        </TouchableHighlight>}
    />
  )
}
4) Add a method below the render method to send the navigate request when a movie is selected in the list of movies,
Command + S to save your JS change afterwards.
_onPressRow (movie) {
   movie.isSelect = !movie.isSelect
   NavigationApi.requests().navigate('MovieDetailsMiniApp', {'initialPayload': JSON.stringify(movie)}).catch(() => {
     console.log("Navigation failed.");
   })
 }
5) Implement the NavigationApi in the native application, as we did for the MovieApi.
- Replace the content of
MainActivity.javawith the following code:
package com.walmartlabs.ern;

import android.content.Intent;
import android.support.annotation.NonNull;
import android.support.annotation.Nullable;
import android.support.v7.app.AppCompatActivity;
import android.os.Bundle;
import android.util.Log;
import android.widget.Toast;

import com.ernnavigation.ern.api.NavigateData;
import com.ernnavigation.ern.api.NavigationApi;
import com.walmartlabs.electrode.reactnative.bridge.ElectrodeBridgeRequestHandler;
import com.walmartlabs.electrode.reactnative.bridge.ElectrodeBridgeResponseListener;
import com.walmartlabs.ern.container.ElectrodeMiniAppActivity;
import com.walmartlabs.ern.container.miniapps.MiniAppsConfig;
import com.walmartlabs.ern.container.miniapps.MovieListMiniAppActivity;

// This is the main activity that gets launched upon app start
// It just launches the activity containing the miniapp
// Feel free to modify it at your convenience.
public class MainActivity extends AppCompatActivity {
    @Override
    protected void onCreate(Bundle savedInstanceState) {
        super.onCreate(savedInstanceState);
        setContentView(R.layout.activity_main);

        getIntent().getBundleExtra("data");

        Intent i = new Intent(this, MovieListMiniAppActivity.class);
        this.startActivity(i);

        NavigationApi.requests().registerNavigateRequestHandler(new ElectrodeBridgeRequestHandler<NavigateData, Boolean>() {
            @Override
            public void onRequest(@Nullable NavigateData navigateData, @NonNull ElectrodeBridgeResponseListener<Boolean> responseListener) {
                if (!MainActivity.this.isFinishing()) {
                    if (navigateData != null) {
                        Class activityClass = MiniAppsConfig.MINIAPP_ACTIVITIES.get(navigateData.getminiAppName());
                        if (activityClass != null) {
                            Bundle bundle = new Bundle();
                            bundle.putString("payload", navigateData.getinitialPayload());
                            Intent intent = new Intent(MainActivity.this, activityClass);
                            ElectrodeMiniAppActivity.addInitialProps(intent, bundle);
                            MainActivity.this.startActivity(intent);
                        } else {
                            Toast.makeText(MainActivity.this, "No activity found to navigate for: " + navigateData.getminiAppName(), Toast.LENGTH_LONG).show();
                        }
                    } else {
                        Log.e("NAVIGATION", "Not enough data provided to navigate");
                    }
                }
            }
        });
    }
}
- Add the following implementation inside the
ViewController.mfile right below the movie api implementation.
 NavigationAPI *navigationAPI = [[NavigationAPI alloc] init];
    [navigationAPI.requests registerNavigateRequestHandlerWithHandler:^(id  _Nullable data, ElectrodeBridgeResponseCompletionHandler  _Nonnull block) {
        AppDelegate *appDelegate = (AppDelegate *)[[UIApplication sharedApplication] delegate];

        NavigateData *navData = (NavigateData *)data;
        NSMutableDictionary *initialPapyload = [[NSMutableDictionary alloc]init];
        [initialPapyload setObject:navData.initialPayload forKey:@"payload"];

        UIViewController *viewController = [[ElectrodeReactNative sharedInstance] miniAppWithName:navData.miniAppName properties:initialPapyload];
        viewController.view.frame = [UIScreen mainScreen].bounds;
        [viewController setTitle:@"MovieDetails MiniApp"];


        UINavigationController *navController = (UINavigationController *) appDelegate.window.rootViewController;
        [navController pushViewController:viewController animated:NO];

        block(nil, nil);
    }];
- Make sure that you add the
appDelegateimport statement toViewController.mfile as well.
#import "AppDelegate.h"
Adding the MovieDetailsMiniApp
To complete the tutorial, add the MovieDetailsMiniApp to the application.
We've developed and published this MiniApp to reuse it in this tutorial. You may view the code of this MiniApp in the MovieDetailsMiniApp repository.
- To add this MiniApp to the local container used by the native application, use a variation of the
ern runcommand that allows you to include extra MiniApps to the local Container. Let's do that magic now.
$ ern run-android --miniapps moviedetailsminiapp --mainMiniAppName MovieListMiniApp
$ cd MovieListMiniApp //make sure you are in root dir of MovieListMiniApp
$ ern run-ios --miniapps moviedetailsminiapp --mainMiniAppName MovieListMiniApp
Once the app is launched click on any movie and you will be taken to the details page of MovieDetailsMiniApp.
This is how easy it is to combine multiple MiniApps in a local container!
You've successfully used Electrode Native to build your first native application, composed of multiple MiniApps.
In this tutorial, we've covered only a small part of what Electrode Native offers. Be sure to check the rest of the Electrode Native documentation to learn about all the features that Electrode Native offers.